Link UI component with user rights
UI components can be linked to any number of user rights via the Rights property. For this purpose, a specific right, e.g. ProductEdit, is linked to one of three possible states (strategy) of a UI component:
-
ENABLED - The UI component is enabled.
-
VISIBLE - The UI component is visible.
-
READ_ONLY - The UI component can only display data. Inputs or changes are not possible.
This covers a total of 6 different states:
| Law | Explanation | Cases | Strategy | Status | State |
|---|---|---|---|---|---|
ProductEdit |
User may save customer records. |
Right exists. |
ENABLED |
TRUE |
UI component is enabled. |
VISIBLE |
TRUE |
UI component is visible |
|||
READ_ONLY |
FALSE |
UI Component displays value. However, entering or editing values is not possible. |
|||
UI component is not available. |
ENABLED |
FALSE |
UI Component is disabled. |
||
VISIBLE |
FALSE |
UI component is invisible. |
|||
READ_ONLY |
TRUE |
Enter or edit values is possible. |
Since user rights depend on the use case, all rights must be defined by the user. Common rights include
-
None - user has no permission.
-
Create - user is allowed to create a new record.
-
Read - user is allowed to read a record.
-
Edit - user may change a record.
-
Delete - user may delete a record.
which are needed for almost every input mask as well as for the views themselves, e.g. for the entity Product:
-
ProductNone - user on no access to the product record.
-
ProductCreate - user is allowed to create a new product record.
-
Product Read - user is allowed to read a product record.
-
Product Edit - user is allowed to modify a product record.
-
Product Delete - user is allowed to delete a product record.
This can result in a very large number of different rights for a larger application.
|
-
Click a UI component to which you want to assign rights, e.g. a Save button.
-
Click at Properties > Authorization > Rights on ….
-
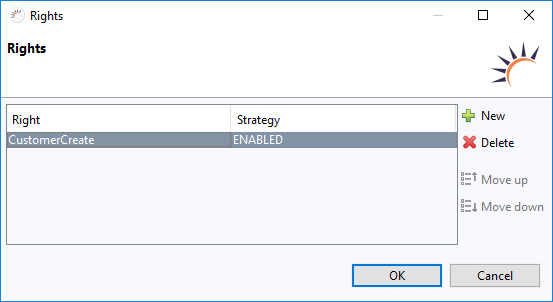
In the following Rights dialog, click + New to add a new right.
-
At Right, enter the name for a new right, e.g. CustomerCreate, or select an existing right.
-
For Strategy, select a possible state for this UI component, e.g. ENABLED.
-
Click OK.
Result:
-
AuthorizationResources - In Project Management > main-java this class is created to manage the rights globally.
package com.company.demoproject; import java.util.MissingResourceException; import com.rapidclipse.framework.security.authorization.Resource; import com.rapidclipse.framework.security.authorization.ResourceEnum; import com.rapidclipse.framework.server.resources.Caption; import com.rapidclipse.framework.server.resources.StringResourceUtils; import com.rapidclipse.framework.server.security.authorization.Authorization; /** * Central collection of all authorization resources used in the project. */ @Caption("{%description}") public enum AuthorizationResources implements ResourceEnum<AuthorizationResources> { CREATE("create"), READ("read") ; /** * Helper method to export all resource names. * <p> * Right click and select 'Run As' - 'Java Application' * </p> */ public static void main(String[] args) { for(AuthorizationResources value : AuthorizationResources.values()) { System.out.println(value.name); } } ///////////////////////////// // implementation details // /////////////////////////// private final String name; private Resource resource; private String description; private AuthorizationResources(final String name) { this.name = name; } @Override public String resourceName() { return this.name; } @Override public Resource resource() { if(this.resource == null) { this.resource = Authorization.resource(this.name); } return this.resource; } public String getDescription() { if(this.description == null) { try { this.description = StringResourceUtils.getResourceString(name(), this); } catch(final MissingResourceException e) { this.description = this.name; } } return this.description; } } } -
UI component - The UI component is associated with the right.
/*
 * WARNING: Do NOT edit!<br>The content of this method is always regenerated
 * by the UI designer.
 */
// <generated-code name="initUI">
private void initUI() {
    this.button = new Button();
    this.button.setText("Save");
    Authorization.setSubjectEvaluatingComponentExtension(this.button, SubjectEvaluatingComponentExtension.Builder.New()
            .add(AuthorizationResources.CREATE.resource(), SubjectEvaluationStrategy.ENABLED).build());
    Authorization.evaluateComponents(this);