Create new project
-
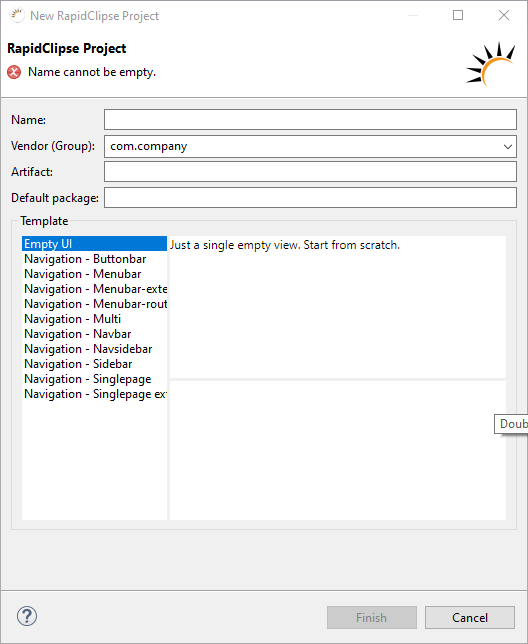
From the menu, select File > New > RapidClipse Project.
-
In the following project wizard, enter the name of your project at Name, e.g. Example.
-
Click Finish.
|
When creating a new RapidClipse project, all libraries required for a RapidClipse project with their dependencies are automatically downloaded once from the Maven Central Repository. You need to be online to do this. The download may take a few minutes depending on your Internet connection. Afterwards, you can work with RapidClipse offline. |
Options:
-
Template - When using a Template other than "Empty UI", some sample views are generated with an already existing navigation.
Result:
-
The wizard automatically loads all libraries needed for a RapidClipse project with associated dependencies via Maven and creates the RapidClipse project.
-
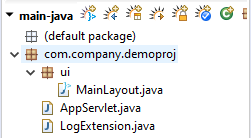
Depending on selected template, UI classes are generated.
Example with "EmptyUI"-template
-
MainLayout.java
package com.company.demoproj.ui; import com.vaadin.flow.component.orderedlayout.VerticalLayout; import com.vaadin.flow.router.Route; @Route("") public class MainLayout extends VerticalLayout { public MainLayout() { super(); this.initUI(); } /* WARNING: Do NOT edit!<br>The content of this method is always regenerated by the UI designer. */ // <generated-code name="initUI"> private void initUI() { this.setSizeFull(); } // </generated-code> } -
AppServlet.java - Starts the application (servlet) in the servlet container.
package com.company.demoproj; import javax.servlet.annotation.WebServlet; import com.rapidclipse.framework.server.RapServlet; @WebServlet(urlPattern = "/*", asyncSupported = true) public class AppServlet extends RapServlet { public AppServlet() { super(); } } -
AppShell.java - A Shell configuration class which implements AppShellConfigurator. Place @Theme and other vaadin annotations here!
package com.company.demoproj;

import com.vaadin.flow.component.page.AppShellConfigurator;
import com.vaadin.flow.server.AppShellSettings;
import com.vaadin.flow.server.PWA;

@PWA(name = "myExample", shortName = "myExample")
public class AppShell implements AppShellConfigurator
{
	@Override
	public void configurePage(AppShellSettings settings)
	{
		settings.addFavIcon("icon", "frontend/images/favicon256.png", "256x256");
		settings.addLink("shortcut icon", "frontend/images/favicon.ico");
	}
}