Internationalization
RapidClipse offers easy ways to internationalize your application. This means that the user can choose in which language the application should be displayed.
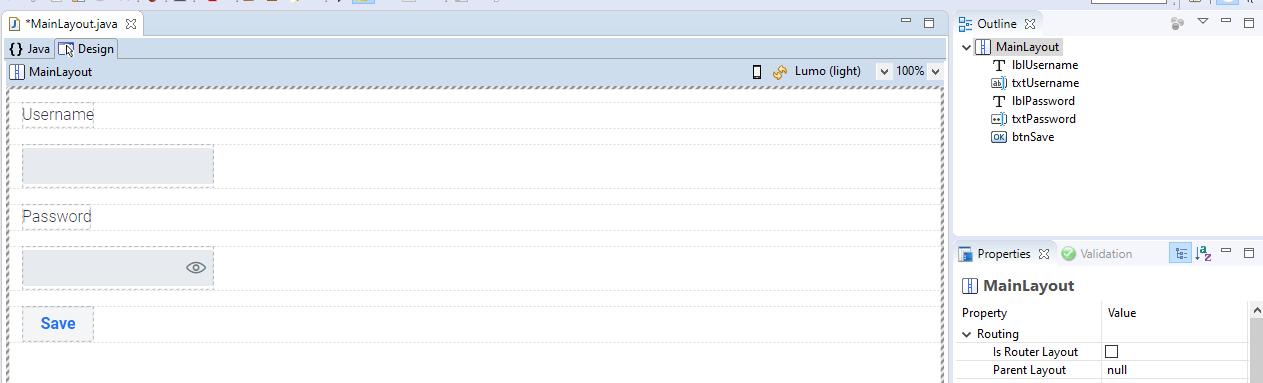
To internationalize the application, the texts like username, password or save have to be swapped into a properties file. For each language that is supported, a separate property file is created.
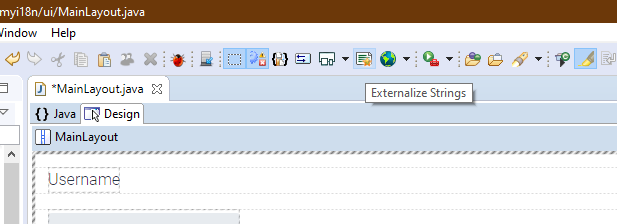
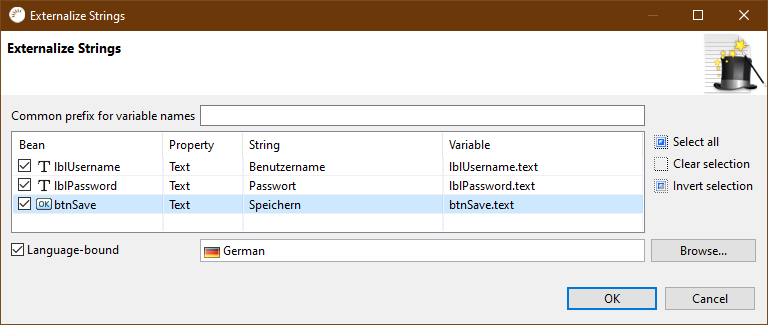
You can let RapidClipse generate this property file, just click on Externalize Strings:
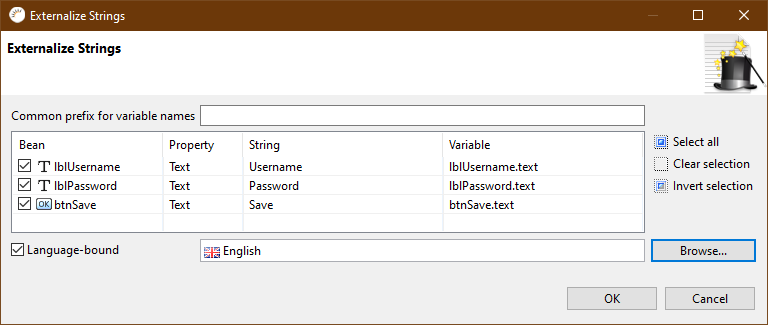
Then select the following in the following dialog:
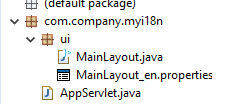
Now a new file has been created in Project Management > main-java > ui, namely MainLayout_en.properties.
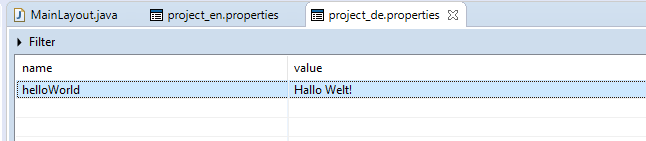
This file contains a table with the variable names on the left side and the values of them on the right side. These values are the texts to be displayed when an English user is viewing the application, or has not yet selected a language.
When you now look at the Properties > Object > Text property of the components in the view, you will notice that they are wrapped in a \{$text}.
RapidClipse automatically recognizes when you enter such a text that it should be translated. To test this, you can drag a new element into the GUI builder, e.g. a label, and then set the Properties > Object > Text property to e.g. ${testText}. If you now go to the Java code view, you will notice that RapidClipse has automatically replaced the text with the following line:
// Generated code without internationalization
this.lblTest.setText("testText");

// Generated code with internationalization
this.lblTest.setText(StringResourceUtils.optLocalizeString("{$testText}", this));
To create the German texts now, you just have to click Externalize Strings again.
Then in the following dialog, enter the German texts:
To display the German texts in the GUI Builder now, you only have to press Live Localization (to the right of Externalize Strings) and select German. To turn off the localization in the Drop Down menu just select - No Live Localization -.
Scopes
If you now have texts that occur again and again and would therefore have to be entered in a new view again and again, you can also create a package-wide or a project-wide property file. In addition simply under Project management > main-resources on the Create a new Property File.  Click button.
Then you can select which views should use this file. If you select Project, any view in your project can access it. If you select a specific folder, e.g. src>main>java>ui, only the views that are in the UI package can access it. Next, you can select the languages for which you want to create a property file.
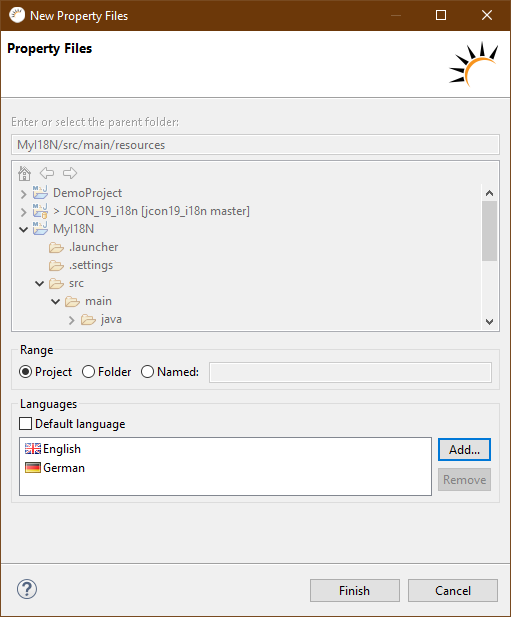
If you pressed Finish, the property files are created in the project-wide case in Project Management > main-resources > project_xx.properties.
If you now create a helloWorld variable, for example, you can use that in any view:
Now just create a Label in your view for example and then enter there under the Properties > Object > Text Property {$helloWorld}.

Selecting language in the application
The user must now be able to select his language. The language must be set before the construction of the component. To save the language between views, it is suggested to save it in the session. This can be done as follows:
Example
-
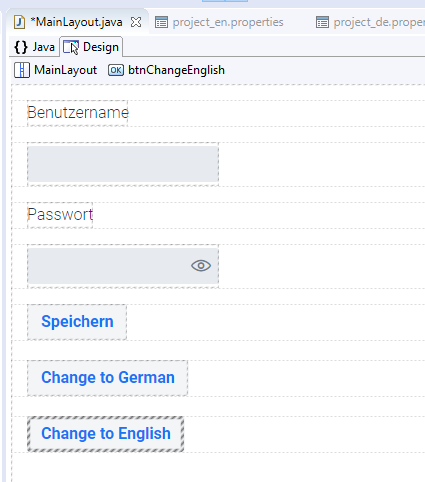
Create two new buttons
-
Double click on the "Change to German" Button now.
-
Now enter the following code in the Event:
/** * Event handler delegate method for the {@link Button} {@link #btnChangeGerman}. * * @see ComponentEventListener#onComponentEvent(ComponentEvent) * @eventHandlerDelegate Do NOT delete, used by UI designer! */ private void btnChangeGerman_onClick(ClickEvent<Button> event) { UI.getCurrent().getSession().setAttribute(Locale.class, Locale.GERMAN); UI.getCurrent().getPage().reload(); } -
Do the same for the "Change to English" button.