Migration from 10/X to version 11
The migration of a RC 10.4.1 application basically works in 2 steps. An automatic migration within the IDE and a manual part in the CSS area. Below is a description of what steps you need to do and how to do them in order to lift your project to the new version 11. Make sure you have a proper backup strategy for your project at all times (GIT, manual backups, etc.).
Step 1 Preparation:
-
Create a new RapidClipse 11 installation with a new workspace.
-
Import your backup of the project you want to migrate to or clone your project into the IDE and create a new branch to migrate to
-
Make sure that the same basic settings are available in the new IDE that were available in version 10.4.1, e.g.
-
Make JDK versions available
-
Export and import database connections from "DataSourceExplorer".
-
Include code formatter
-
Install any plugin like JRebel
-
Install Tomcat version
-
-
Make sure that there are no compiler errors in the project at this time.
-
Maven update to eliminate any Maven errors in the project.
-
Right click on the project → Maven → Maven Update.
-
-
Except for certain metafiles, no changes must result from opening in the new IDE or to the project
Step 2 Automatic migration:
-
The automatic migration can be started in two ways
-
With the start of the IDE it is checked automatically whether there are projects in the "ProjectManagement", which were not updated yet. Thereupon it is asked whether you would like to update.
-
Right click on the project → RapidClipse → Update Project.
-
-
The following changes should result from the migration
-
Changes in the Pom.xml
-
Framework versions are raised
-
Added additional necessary entries in Pom.xml
-
Removed entries in Pom.xml that are no longer needed
-
-
File extensions of ".ui.xml" are changed to ".uixml".
-
New "frontend" package is added to the root
-
Adjustment of the ".gitignore" if available for all NPM elements
-
Step 3 Manual migration:
First, what has changed fundamentally:
-
@HtmlImports in the code no longer work and has been replaced by @CSSImports.
Example:-
Version 10.4.1 old import: @HtmlImport("frontend://styles/shared-styles.html")
-
Version 11 new import: @CssImport("./styles/custom-style.css")
-
-
As you can further see from the above example, there are no more .html files these are all replaced with .css files.
-
The CSS files are no longer located in ".main.webapp.frontend." but from now on directly in the root directory in the folder ".frontend. ".
-
The structure of the CSS files has also changed here more details: https://vaadin.com/docs/v14/flow/styling/custom-theme
Steps for migration:
-
Step 1: Whether you used a theme in your old application or not, it still makes sense to create a new theme first.
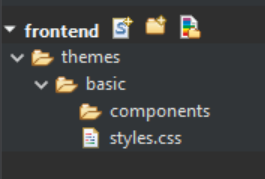
To do this, click on the Create Theme button in the "frontend" section of the ProjectManagement.
Assign a name for the new theme here as an example "basic". As a result your "frontend" area should look like this
-
Step 2: All theme variables are now copied from the former "shared-styles.html" to the new "styles.css".

The same is true for theme variants like the Lumo Dark.

-
Step 3: Move your own style classes. As described above, you can easily move your own style classes. However, these files must not be .html files, but .css files.
A MyCustomStyles.html becomes a MyCustomStyles.css. The content remains unchanged. However, the imports must be adapted, for this there are two possibilities.-
All imports are combined in the styles.css.

-
Or the imports are added directly to the respective Java classes.

-
A mix of both variants is also possible, but an import in a Java class must be imported only once on the top level.
-
-
Step 4: Relocate component related styles implemented via a "dom-module".
Example version 10.4.1: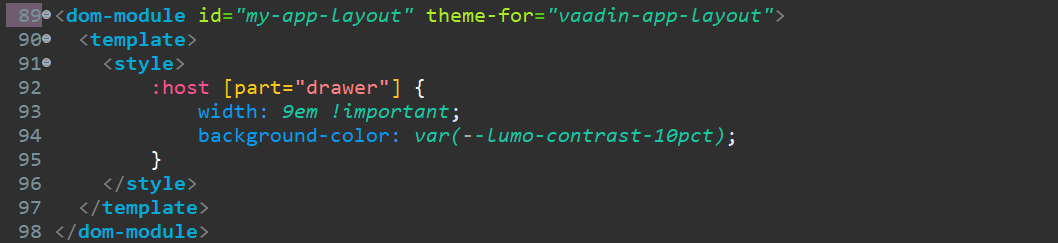 .. In the "components" folder, create a file with the name "vaadin-app-layout.css". The name always corresponds to the name of the component you want to change.
.. Now just add the ":host" part to the new file
.. In the "components" folder, create a file with the name "vaadin-app-layout.css". The name always corresponds to the name of the component you want to change.
.. Now just add the ":host" part to the new file+

-
With the Import it behaves then completely exactly like with the custom styles described above.
-
All information about themes can be found in our documentation. Frontend & Design or also directly at Vaadin. https://vaadin.com/docs/v14/flow/styling